Connect Wallet to PTB Builder
In this lesson, you'll connect your Slush wallet to PTB Builder. It's not difficult—follow the steps and you'll be done in a few minutes.
What is PTB Builder?
PTB Builder is a developer tool that lets you visually build and execute Sui transactions (Programmable Transaction Blocks / PTBs).
Normally, creating transactions requires using the CLI or SDK, but with PTB Builder, you can assemble transactions simply by dragging and dropping blocks.
By connecting your wallet, you can:
- Use your own wallet address
- Sign the transactions you create
- Execute them on the actual blockchain
- Connect your wallet (this lesson)
- Visually create a transaction
- Sign and execute
Two Ways to Use PTB Builder
There are two ways to use PTB Builder:
-
External site (ptb.wal.app)
- Both Editor and Viewer functionality
- Supports Devnet / Testnet / Mainnet
- Use when you need full functionality
-
On-site demo (PTB Builder Demo)
- Editor functionality only
- Devnet only
- Used in future lessons after deploying Move modules
In this lesson, we'll learn wallet connection basics using the external site. In future lessons, we'll primarily use the on-site demo for convenience.
Prerequisites
Before starting this lesson, make sure you have completed the following:
Steps
1. Open PTB Builder
Access PTB Builder from the link below.
2. Select the network and click "Connect Wallet"
Select the network you want to use from the dropdown in the center of the screen.
In this tutorial, select "DEVNET" and click the "Connect Wallet" button.
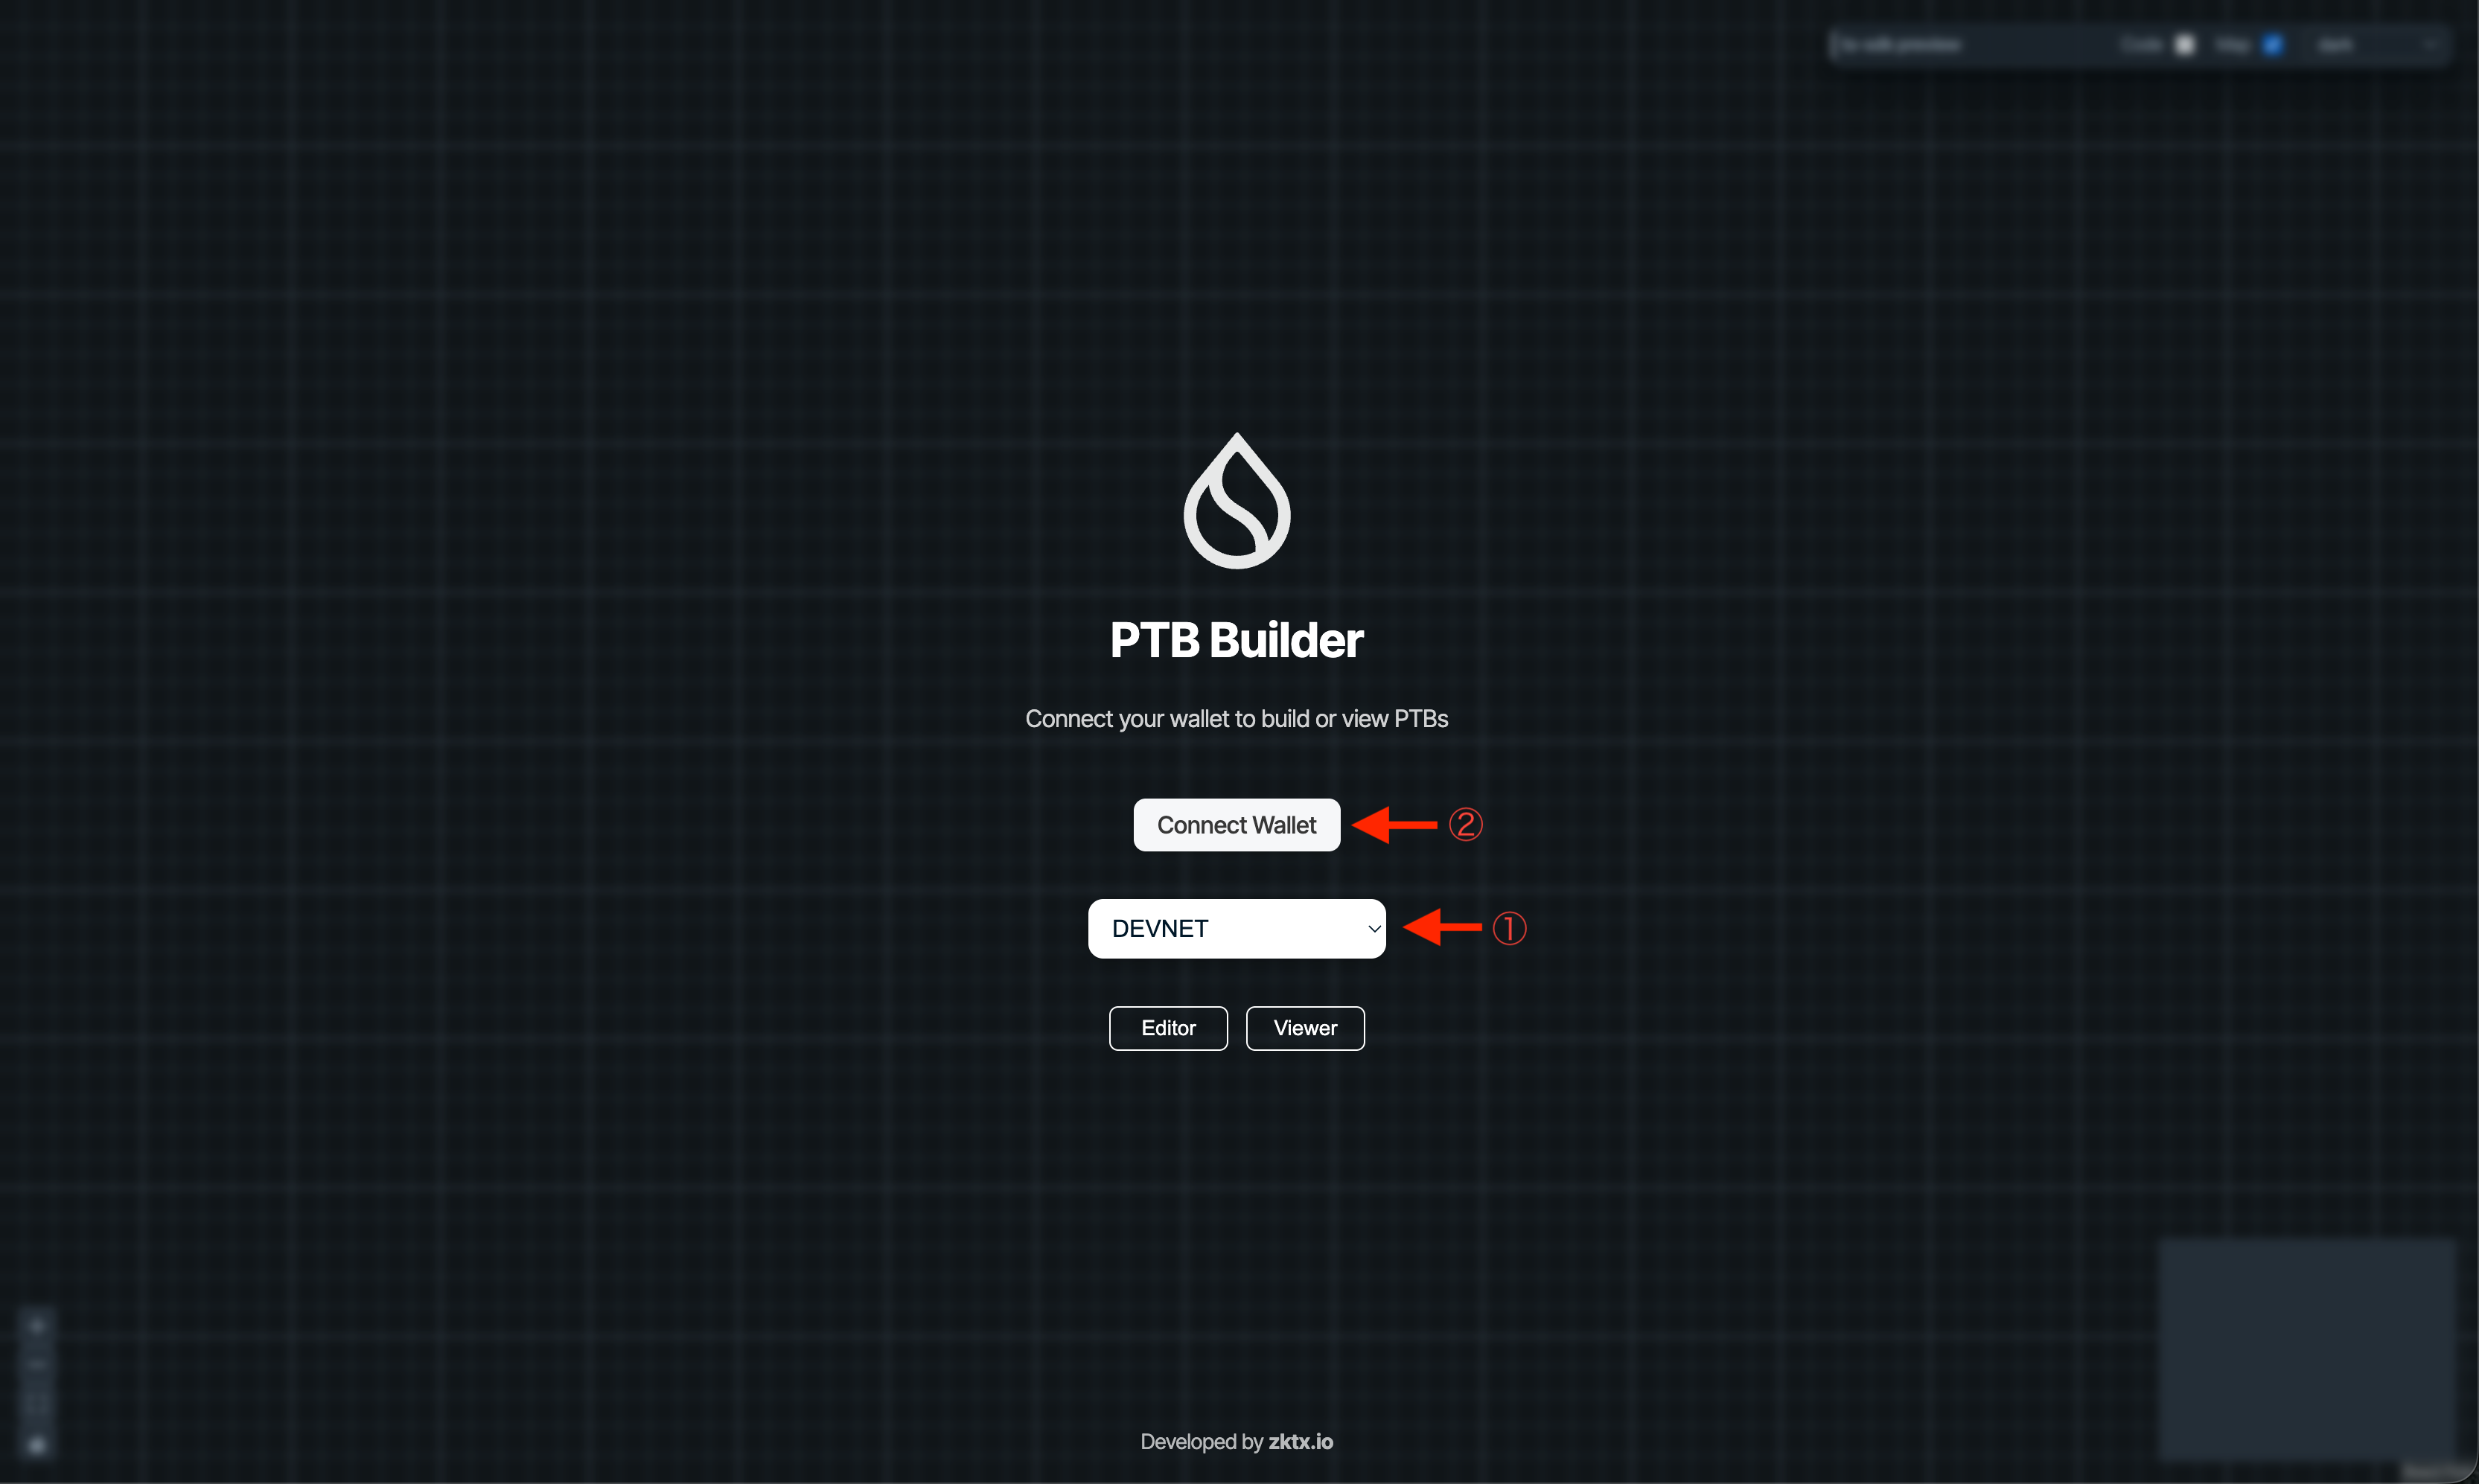
Make sure to select the same network as your Slush wallet. In this tutorial, we use Devnet for both.
3. Select Slush
The wallet selection screen will appear.
Select "Slush" from the list.
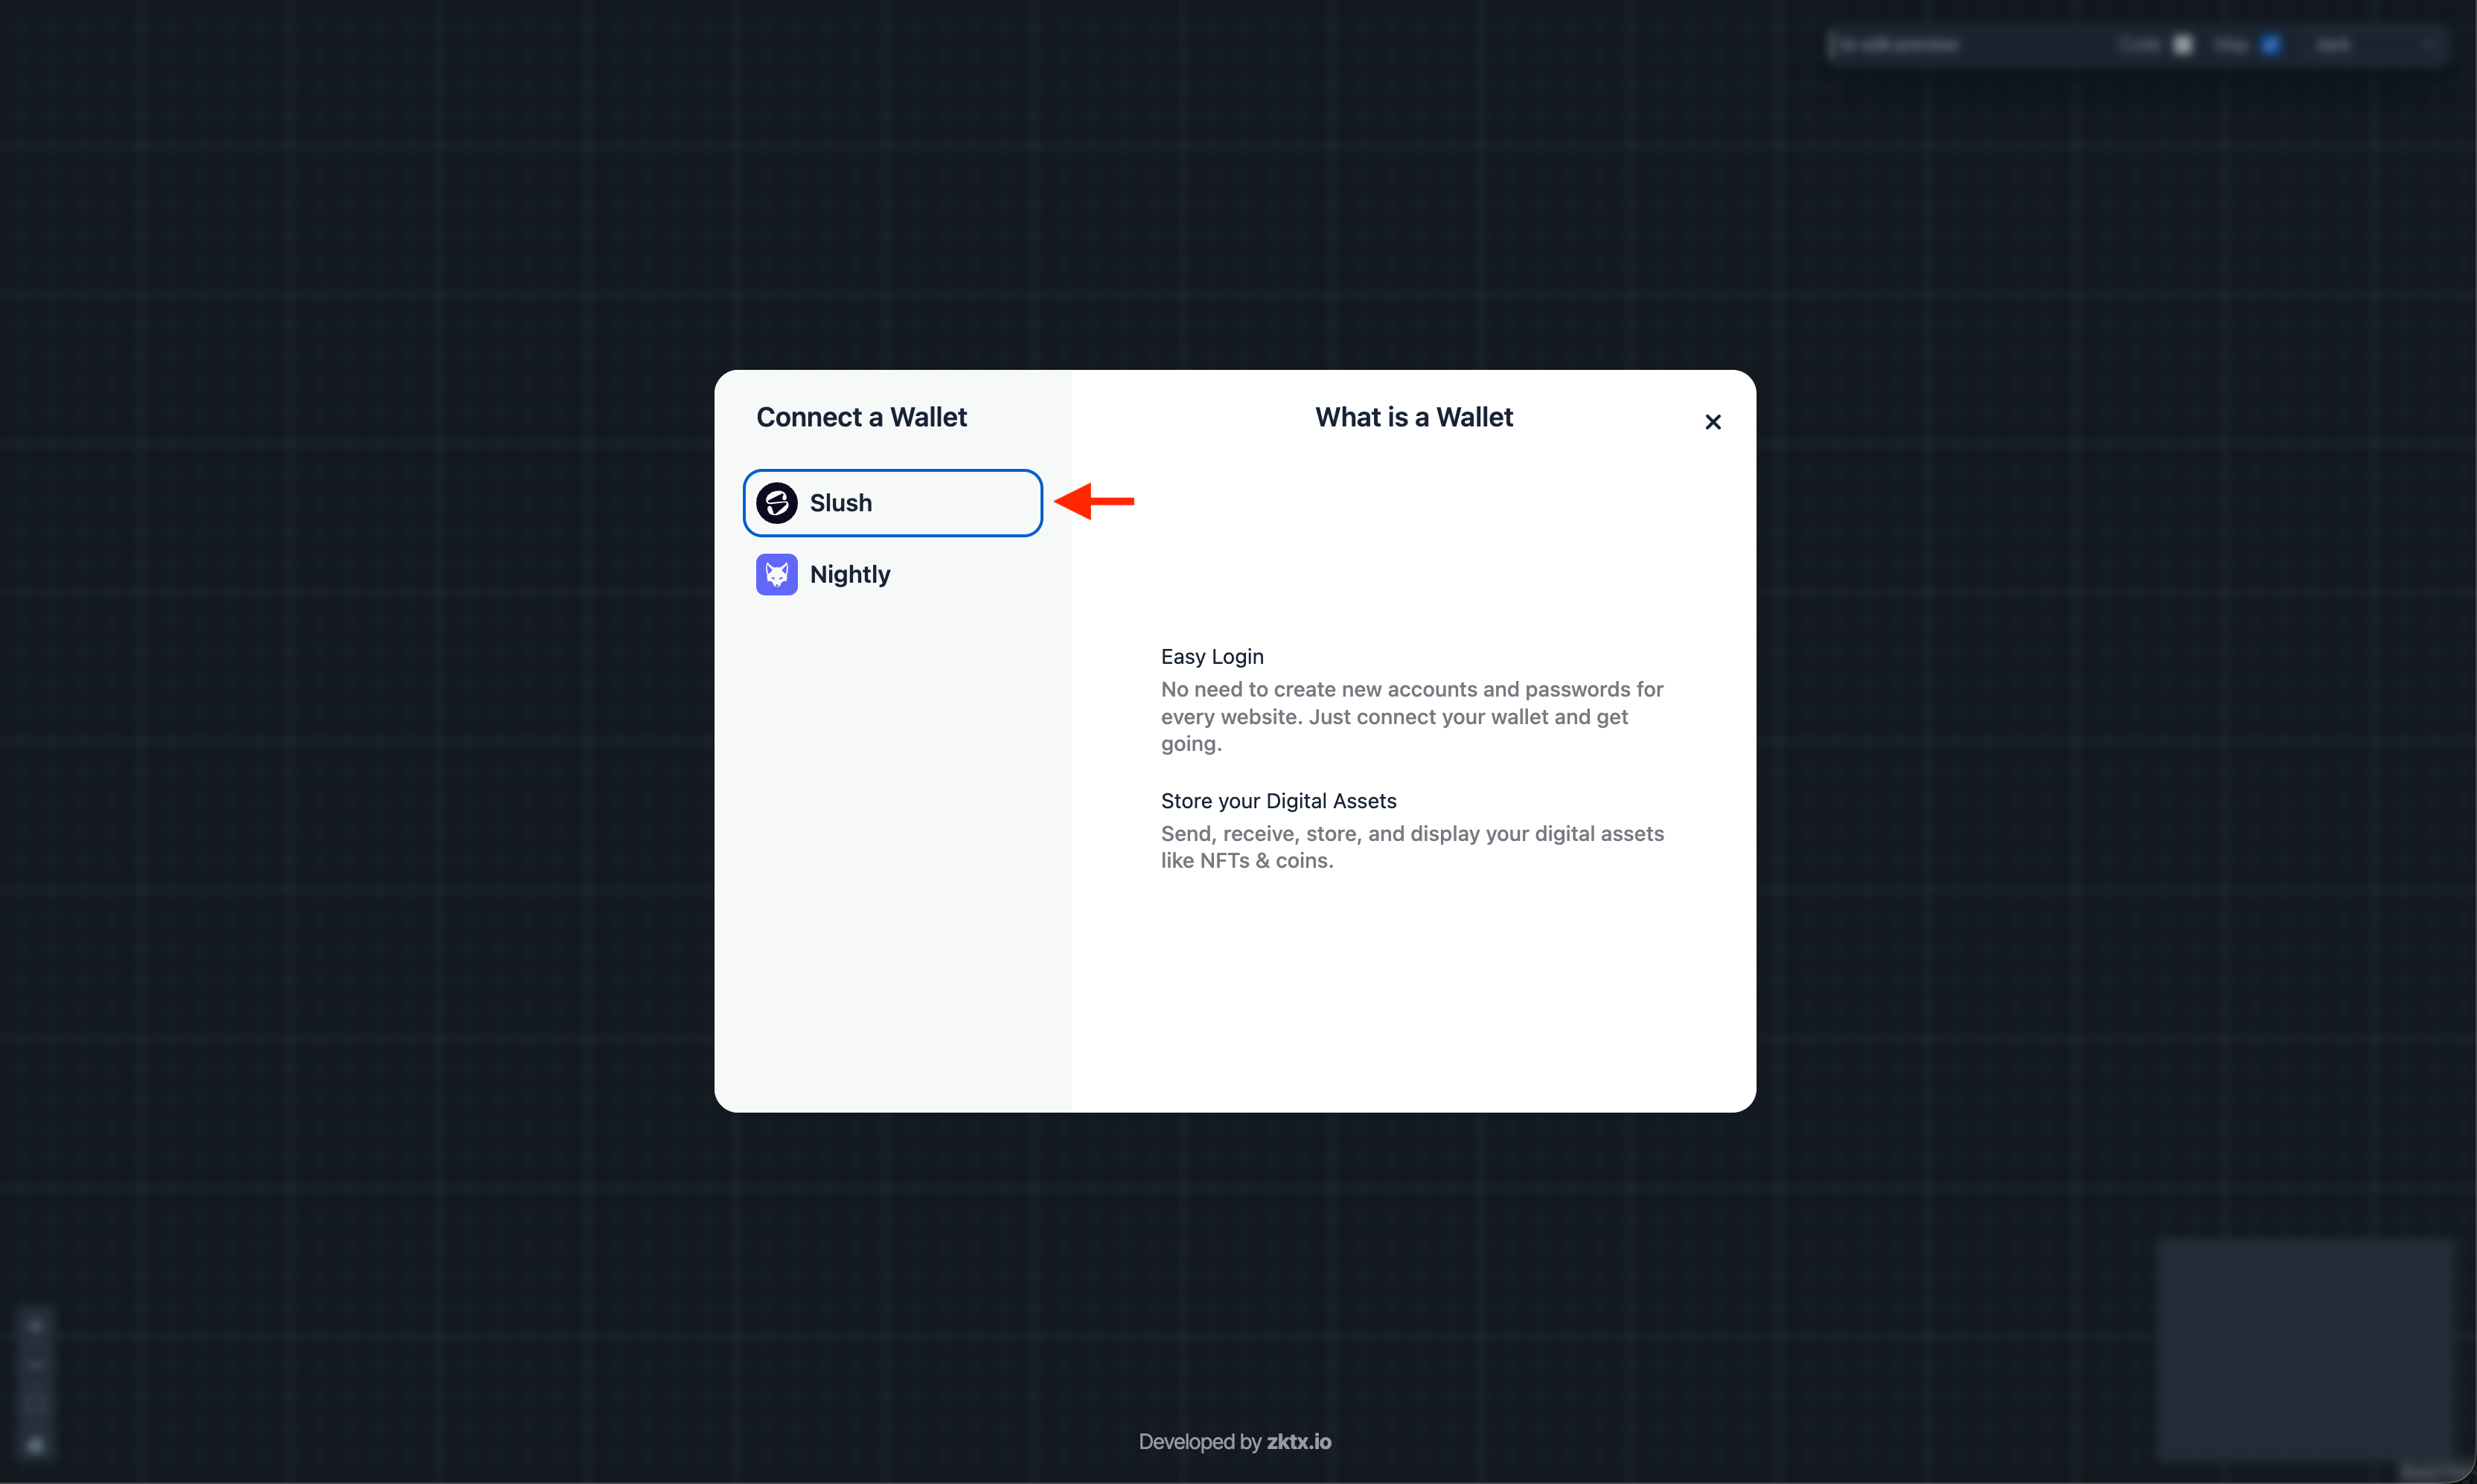
You can also select other Sui-compatible wallets like Sui Wallet, Suiet, or Ethos Wallet. In this tutorial, we use the Slush wallet.
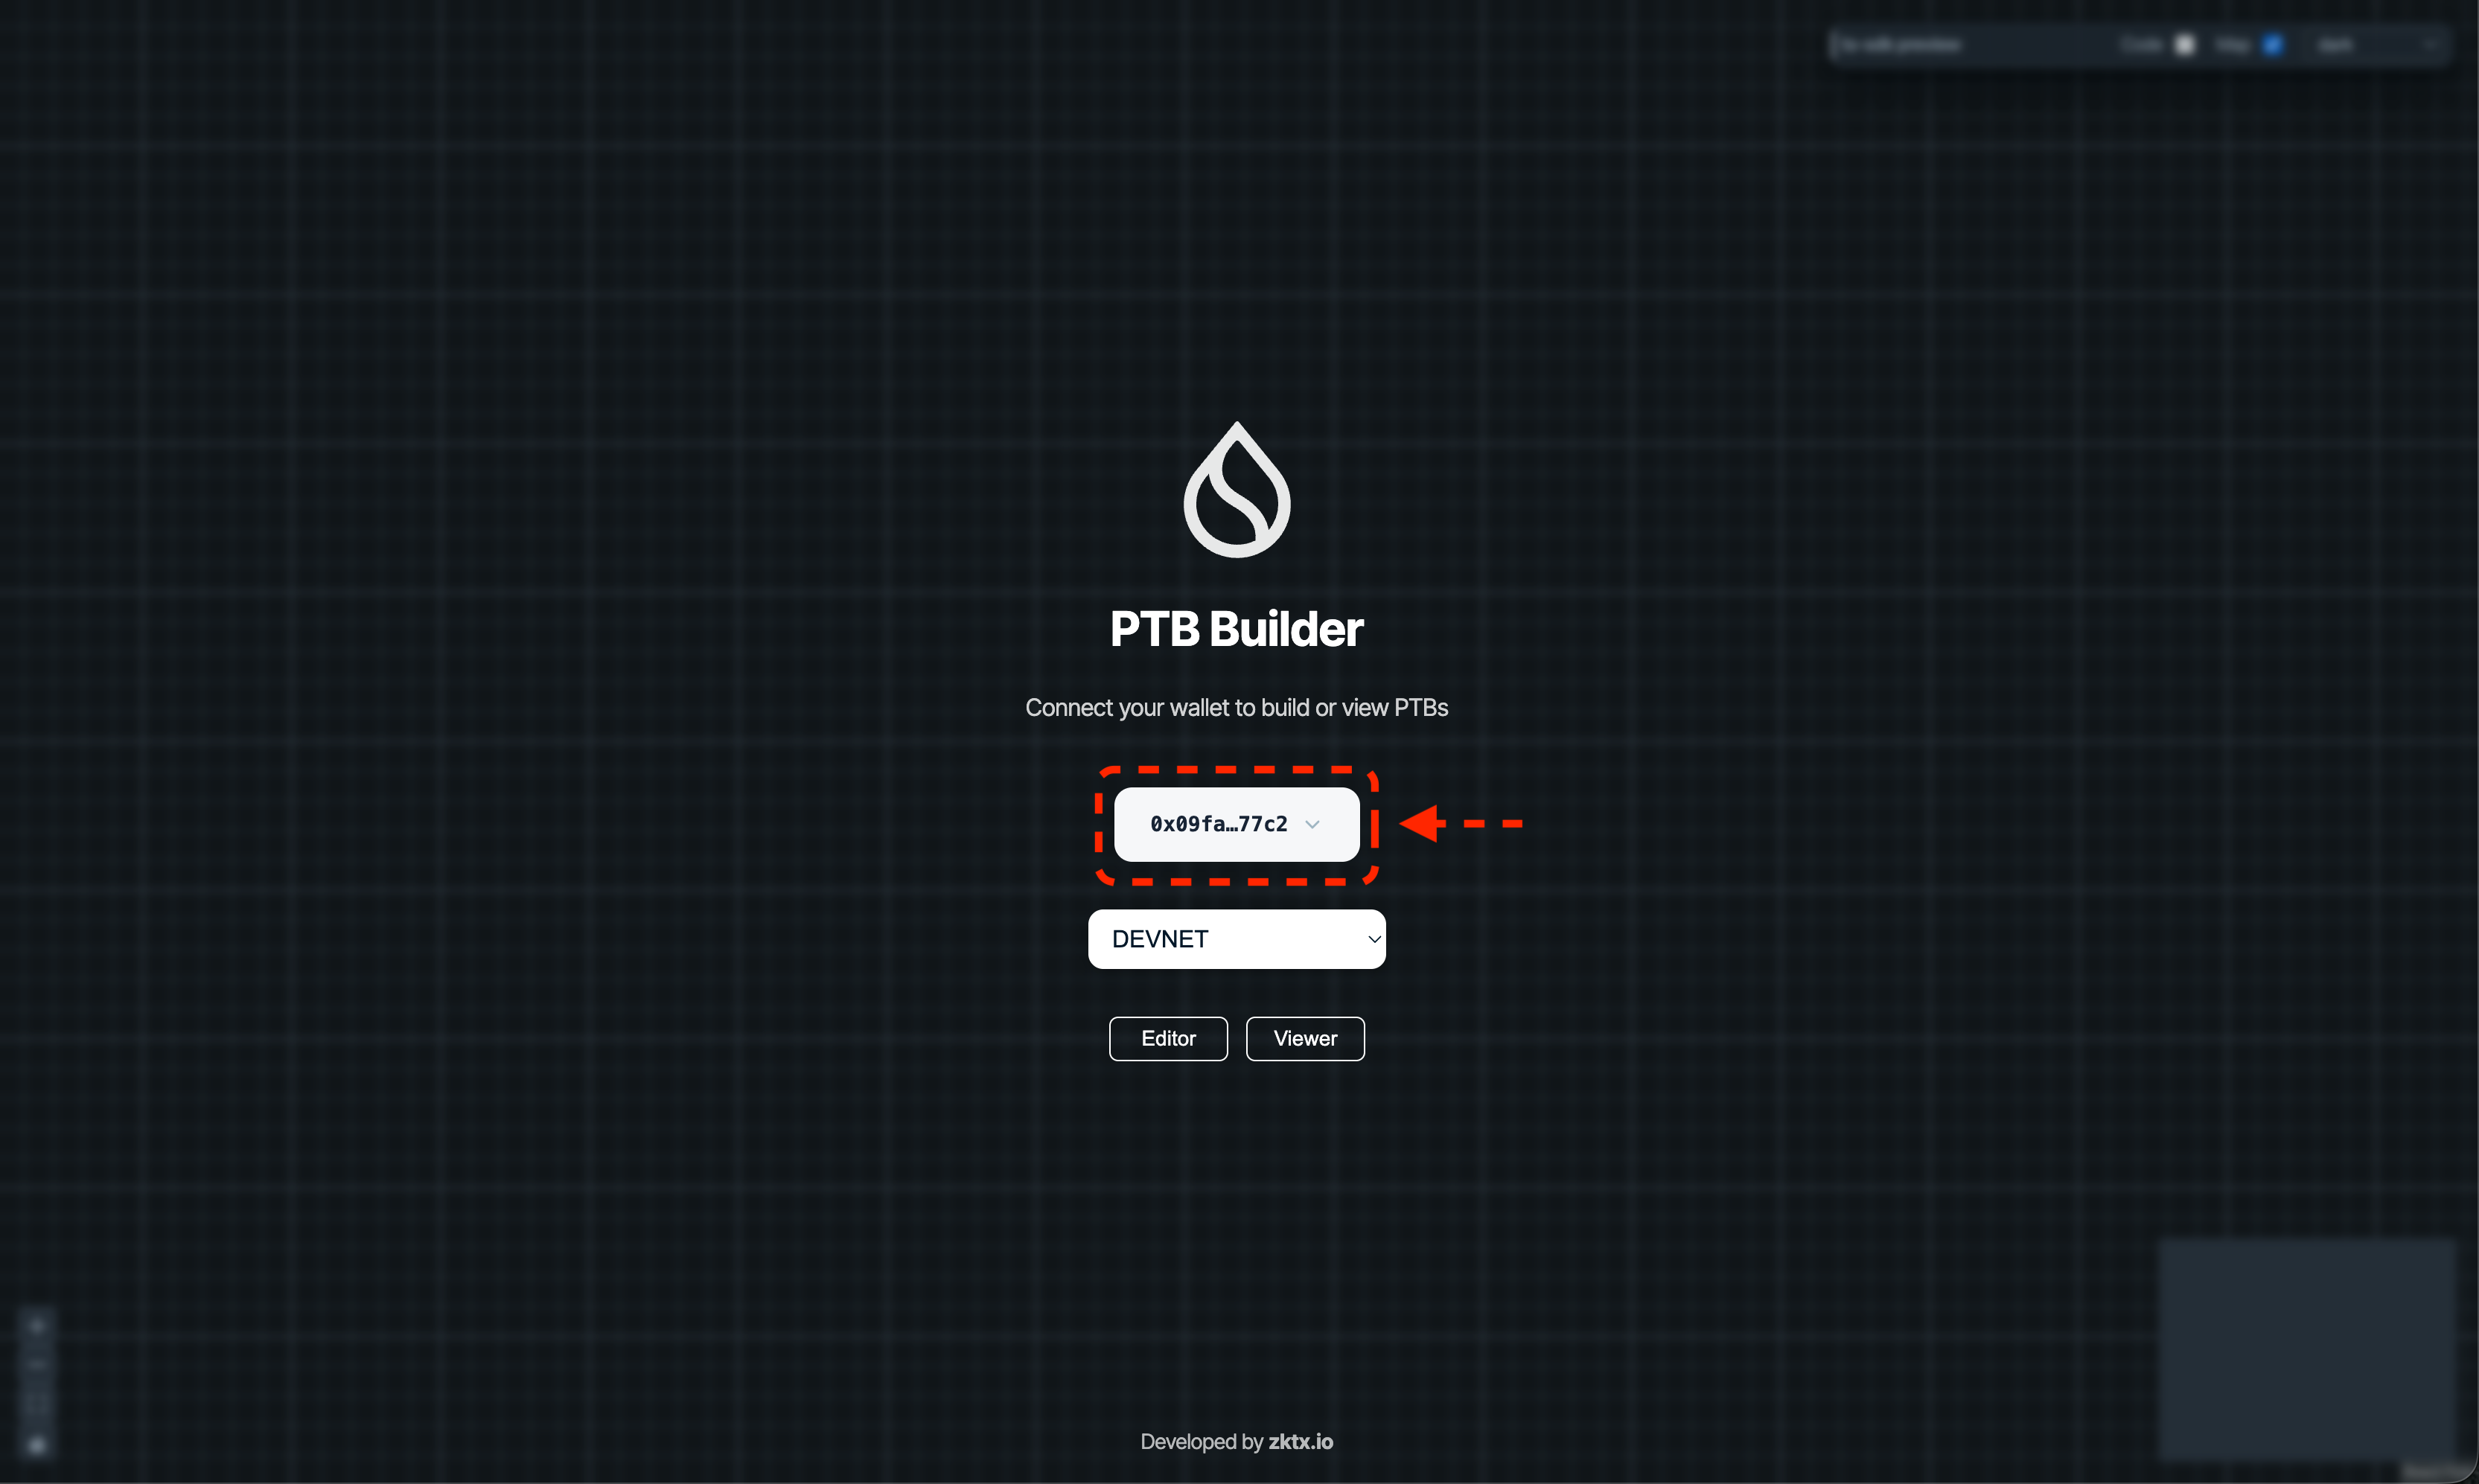
4. Approve the connection
A Slush wallet popup will appear. If prompted, enter your password, select the wallet address you want to connect, and click "Approve".
Once connected, the "Connect Wallet" button will change to display your connected wallet address.
5. Select Editor / Viewer
There are two buttons at the bottom of the screen. Choose based on your purpose:
- Editor: Visually build a new transaction
- Viewer: Visually review the flow of executed transactions
Verify Success
If you see the Editor or Viewer screen, your wallet connection is complete.
What you did in this lesson
- Understood what PTB Builder is
- Accessed PTB Builder (ptb.wal.app)
- Set the network to Devnet
- Connected your Slush wallet
- Confirmed successful connection
PTB Builder for Future Lessons
PTB Builder is also embedded in this site.
In future lessons, you'll use this PTB Builder to build and execute transactions after deploying Move modules. You can try it right within the lesson flow without navigating to an external site.
The on-site PTB Builder supports Editor functionality only and Devnet only. For viewing executed transactions (Viewer) or using other networks, please use ptb.wal.app.