Generate TS Code with PTB Builder
In this lesson, you'll learn how to view the TypeScript code for a PTB you built in PTB Builder, and export the PTB definition as a .ptb file. It's straightforward — just click a button.
Why is Export Useful?
PTB Builder is a visual editor that makes it easy to build PTBs intuitively. However, in actual dApp development, you need to construct transactions in code.
With the export feature, you can:
- Build even complex transactions intuitively with the GUI and output them as code
- Use it as a starting point for your implementation
- Great for learning — if you're unsure how to write the code, build it in the GUI and export it for reference
Prerequisites
Before starting this lesson, make sure you've completed:
- L10: Batch Multiple Commands (recommended)
- Sui Extension installed in VSCode
Even if you haven't completed L10, that's okay. This lesson uses a sample PTB to demonstrate the export feature.
Try Export in PTB Builder
The visual editor below has the PTB from the previous lesson (L10) — a "double transfer combined into one transaction" — pre-loaded.
Follow the Guide in the top-left to walk through the export steps.
Open the Downloaded .ptb File in VSCode
The exported .ptb file is not TypeScript code — it's a PTB graph definition saved in JSON format.
With the Sui Extension installed in VSCode, opening a .ptb file displays the same PTB Builder UI as the web version. You can also check the TypeScript code from the ts-sdk preview window in VSCode.
This means you can create a .ptb file and build and edit PTBs directly inside VSCode.
For installation instructions, see Install Sui Extension in VSCode.
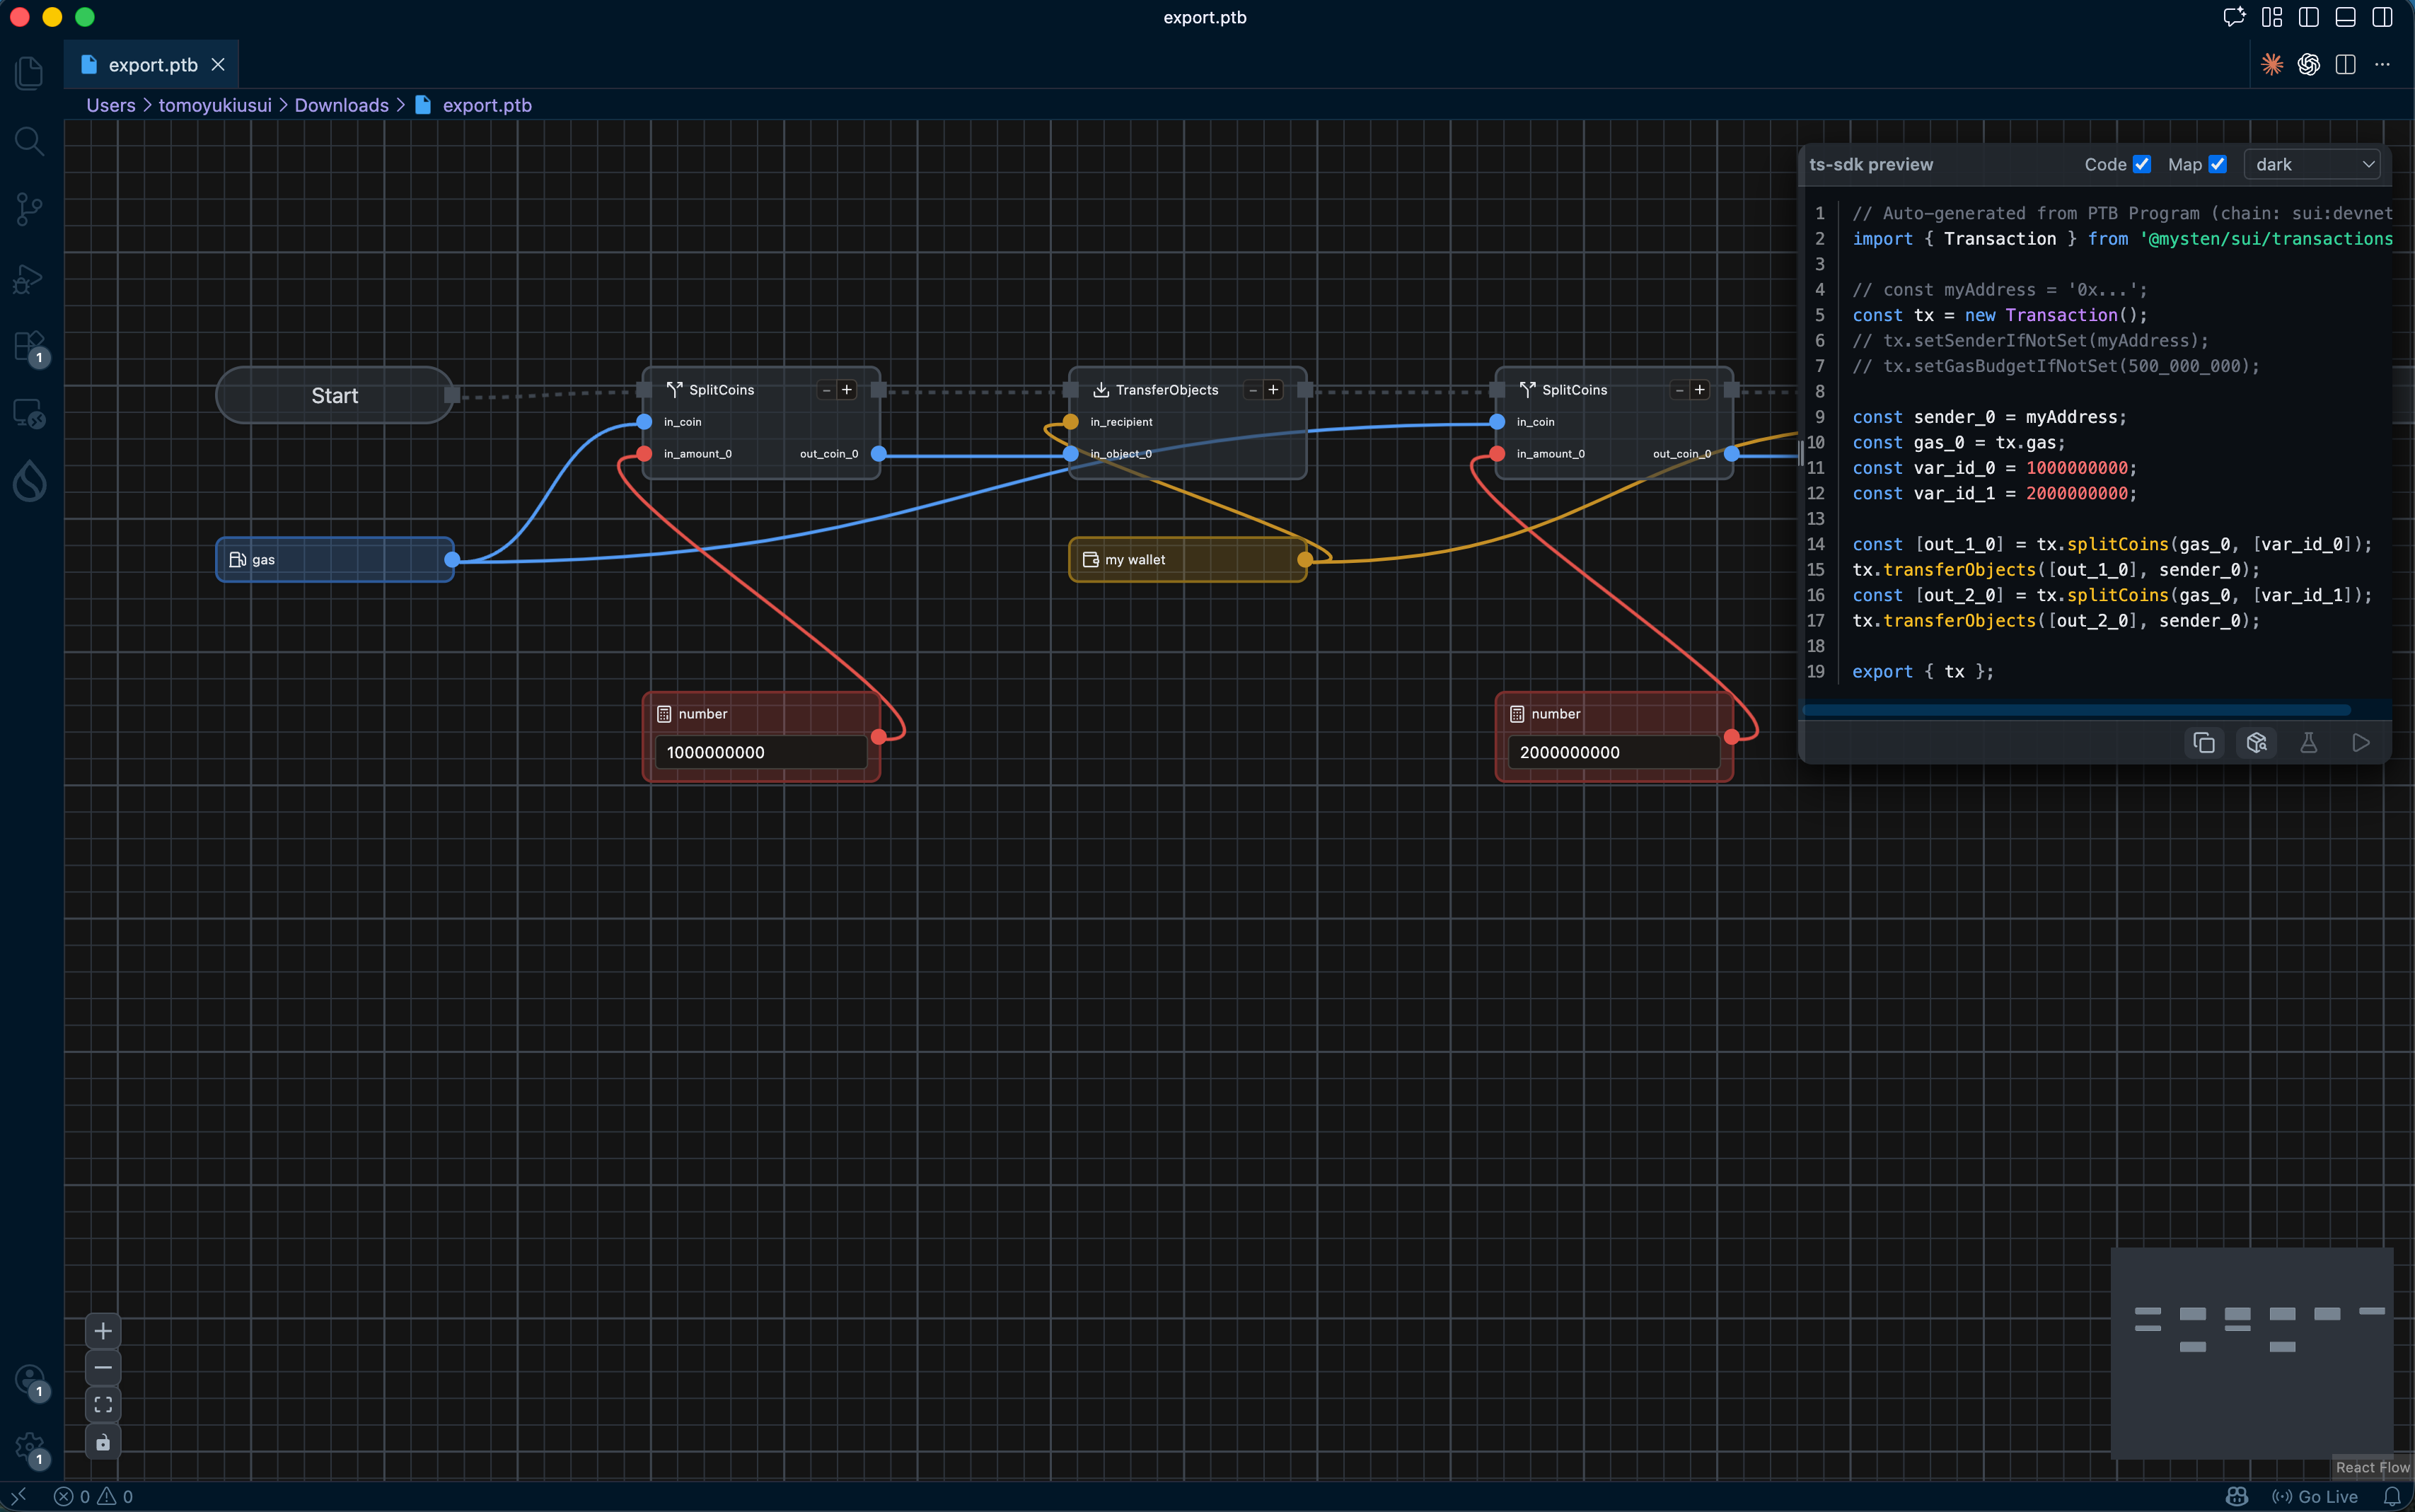
Check the TS Code
The TypeScript code shown in the ts-sdk preview window has a structure like this:
// Auto-generated from PTB Program (chain: sui:devnet)
import { Transaction } from '@mysten/sui/transactions';

const myAddress = '0xe8d3...'; // your connected wallet address
const tx = new Transaction();
tx.setSenderIfNotSet(myAddress);
// tx.setGasBudgetIfNotSet(500_000_000);

const sender_0 = myAddress;
const gas_0 = tx.gas;
const var_id_0 = 1000000000;
const var_id_1 = 2000000000;

const [out_1_0] = tx.splitCoins(gas_0, [var_id_0]);
tx.transferObjects([out_1_0], sender_0);
const [out_2_0] = tx.splitCoins(gas_0, [var_id_1]);
tx.transferObjects([out_2_0], sender_0);

export { tx };
- Import the
Transactionclass and create a new transaction myAddressholds your connected wallet addressgas_0 = tx.gasreferences the gas coin, andsplitCoinssplits the specified amount from ittransferObjectssends the split coins tosender_0(your own address)- Four commands (
splitCoins→transferObjects→splitCoins→transferObjects) are combined into a single PTB export { tx }exports the transaction object
Success Criteria
You've completed this lesson if you can:
- Confirm the TypeScript code in the ts-sdk preview window
- Download the
.ptbfile using the "Export" button - Open the
.ptbfile in VSCode + Sui Extension as a PTB Builder
What You Did in This Lesson
- Understood the purpose of the PTB Builder Export feature
- Reviewed the TS code in the ts-sdk preview window
- Clicked the Export button to download the .ptb file
- Opened the
.ptbfile in VSCode + Sui Extension
Next Steps
The exported code will be used in the advanced course. Understanding how the GUI-built content is expressed in code at this stage will deepen your understanding when learning the SDK.